How do you run Cobian Backup when your PC is in sleep mode? ItΓÇÖs actually not that difficult.
The TL;DR version is that we will be using Windows’ Task Scheduler to start the Cobian Backup task from the command line. For reference I am using Cobian Backup version 11.2.0.582 (the latest and possibly last available version) on Windows 10.
Cobian Backup has been my desktop backup application of choice for years now. It lets me create scheduled backups of my PC files and saves it to two different external hard disks. And that’s really all I need.
So letΓÇÖs get started: here are the steps to run Cobian Backup when your PC is asleep.
0) (Windows 8 & 10) Install Cobian Backup
This is an additional step for Windows 8 & 10 users. If your experience mirrored my own you tried installing Cobian Backup when you moved to Windows 8 or 10 and got an error. Well the good news is that Cobian Backup works just fine on Windows 8 and 10 though you may need to activate/install the .NET 3.5 framework in order to be able to use Volume Shadow Copies
. Follow the previous link for further instructions.
1) Create your backup tasks in the Cobian Backup interface as per usual
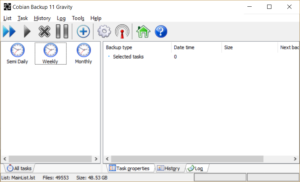
This step is self-explanatory. Launch the Cobian Backup interface (cbInterface.exe) and create your backup tasks as you normally would.
Make sure the tasks are enabled. After going through all these steps I made the mistake of disabling the tasks in the Cobian Backup interface thinking that I no longer needed them enabled. I was wrong.
As an added step, make sure you set each task to Manual. This will prevent the task from automatically running.
2) Open MainList.lst in your favourite text editor (Notepad is fine too)
Locate the MainList.lst file. Assuming you installed Cobian Backup in the default directory of Program Files then the complete path to the file would be C:\Program Files (x86)\Cobian Backup 11\DB\MainList.lst. Open the file up in any text editor.
For those wondering, MainList.lst contains all the settings for each task created in the Cobian Backup interface earlier.
3) Record the Id for each task
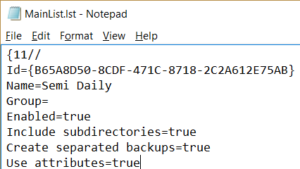
Here’s where you’ll need pen-and-paper handy (or your favourite text editor since it’s already open) because we’re going to record the Id of each task you want to run. The easiest way is to do a search for the task name. The Id is right above it.
In the image above you can see I created a task called “Semi Daily” and it was assigned a task Id of {B65A8D50-8CDF-471C-8718-2C2A612E75AB}. Record this down (yes, including the curly braces).
Record the Id for every task you want to run.
4) Launch Windows Task Scheduler
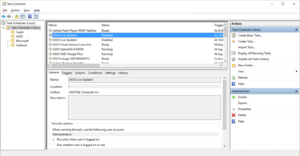
The Windows Task Scheduler is located in Control Panel > Administrative Tools. Or you can search for ΓÇ£Task SchedulerΓÇ¥ in Windows Search.
Either way, launch the application.
5) Create a Windows task
OK, here is the meat and potatoes of everything. Follow these steps:
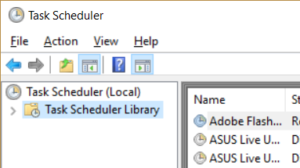
- In the left-most column of the Task Scheduler, click ΓÇ£Task Scheduler LibraryΓÇ¥.
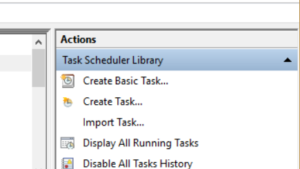
- In the Actions panel (usually the right-most column of the Task Scheduler), click “Create Task…”. Note: do not click “Create Basic Task…”
- When the Create Task dialog appears, give your task a name (Something like “Cobian Backup Monthly”).
- Click the ΓÇ£TriggersΓÇ¥ tab.
- Click ΓÇ£NewΓÇ¥ to create a new Trigger.
- In the Edit Trigger dialog, click the menu next to “Begin the task:” and select “On a schedule”.
- Now go through the Settings. This is where you will set the schedule for the task. Set the schedule you need.
- Now go through the Advanced settings. Make sure Enabled is ticked. For the other options you can choose to tick them depending on your situation.
- Click OK to close the Edit Trigger dialog. You should see your new Trigger added to the list of Triggers.
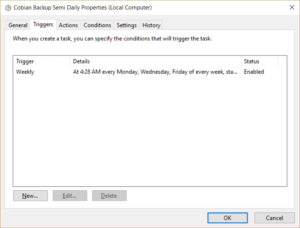
- We’re now back in the Create Task dialog. Click the “Actions” tab.
- Click ΓÇ£NewΓÇ¥ to create a new Action.
- In the New Action dialog, click the menu next to “Action:” and select “Start a program”.
- Under Settings, click the “Browse” button.
- Locate the program
cobian.exe. If you installed Cobain Backup in the default directory it would be located atC:\Program Files (x86)\Cobian Backup 11\cobian.exe. - Click OK to confirm you want to launch
cobian.exe. - For the field “Add arguments (optional):”, you will need to enter
-tasks:TASK_ID -noguibut replace TASK_ID with your actual task Id. For example, I would type enter this: -tasks:{B65A8D50-8CDF-471C-8718-2C2A612E75AB} -nogui - Click OK to close the Edit Action dialog. You should now see your new Action added to the list of Actions.
- Click the ΓÇ£ConditionsΓÇ¥ Tab.
- Now this is important: Under “Power” tick the box “Wake the computer to run this task”.
- Go through the other options in the ΓÇ£ConditionsΓÇ¥ Tab. Set any of them according to your needs. Usually I tick ΓÇ£Start the task only if the computer is on AC powerΓÇ¥ and ΓÇ£Stop if the computer switches to battery powerΓÇ¥.
- Click the ΓÇ£SettingsΓÇ¥ Tab.
- Again, go through the options in this tab and set any of them according to your needs.
- Click OK.
6) Prevent the Cobian Backup Interface from auto-starting with Windows
Now we need to stop the Cobian Backup Interface from auto-starting every time you log into Windows. We need to do this because, at least from my experience, the Windows tasks we created will not run if the Cobian Backup Interface is running.
Hold Ctrl + Shift and press Esc. ThisΓö¼├íwill bring up the Task Manager. Look for ╬ô├ç┬úCobian backup 11 Gravity – Interface╬ô├ç┬Ñ. IfΓö¼├íit╬ô├ç├ûs not there, you don╬ô├ç├ût have to do anything. If it is there, check the Status column to see if it has already been disabled. If it hasn╬ô├ç├ût, right-click it and select ╬ô├ç┬úDisable╬ô├ç┬Ñ.
If you have the Cobian Backup Interface currently running, you should also close it.
7) Stop and Disable the Cobian Backup 11 Gravity service
Cobian Backup usually also installs a Windows Service that auto-starts every time you log into Windows. WeΓÇÖre going to need to disable this fella too or it will prevent the Windows tasks from running.
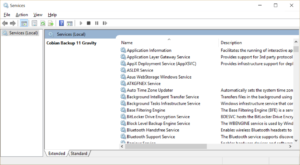
Hold down the Windows key on your keyboard and press R. This will launch the Run dialog. Type in services.msc and click OK. This will launch the Services dialog.
Double-click the service named ΓÇ£Cobian Backup 11 GravityΓÇ¥. In the dialog that appears, click ΓÇ£StopΓÇ¥ to stop the service. Next to ΓÇ£Startup type:ΓÇ¥, select Disable. Click OK to confirm the changes.
Note that you may also have another service called “Cobian Backup 11 Volume Shadow Copy Requester”. It is probably running and auto-starts by default. Do not touch this service.
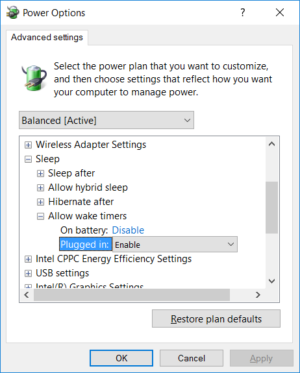
8) (Windows 10) Enable All Wake Timers
Depending on your installation of Windows 10, your Scheduled Task may not run unless you manually enable all wake timers.
- Go to Control Panel > Hardware and Sound > Power Options.
- Click ΓÇ£Change plan settingsΓÇ¥ for your selected power plan.
- Click ΓÇ£Change advanced power settingsΓÇ¥.
- In the Power Options dialog, expand the tree menu for ΓÇ£SleepΓÇ¥.
- Now expand the tree menu for ΓÇ£Allow wake timersΓÇ¥.
- Expand the menu next to “Plugged in” and select Enable.
Finishing up
That’s it! A few things to remember:
- If you ever manually open up the Cobian Backup Interface, remember to close it or it will prevent your backups from running.
- Cobian Backup will not keep logs of the backups run (I havenΓÇÖt been able to get this to work) but the History tab will list the most recent times the backup tasks have taken place. However, logs are (kind of) kept by the Task Scheduler: open the task in question and check the History tab.
- If you want to read up on Cobian BackupΓÇÖs command line arguments, check the Help directory in your local installation. ThereΓÇÖs some information online but itΓÇÖs missing the (rather crucial)
tasksargument.
